Sponsors

Follow Me on Pinterest
Showing posts with label Recipes. Show all posts

Sunday, November 11, 2012

Ombre cake! Ava's birthday cake test run

Ombre!
When I first saw an ombre cake on Pinterest, I knew immediately that I wanted a cake like that for Ava's first birthday. I've baked lots of cakes before but I didn't just want any boxed cake with pre-made buttercream. Since it was her first, I wanted something light and less sugary so she can have a bite at her party. I decided to do a trial run to make sure I knew the amount I needed, timing, and insanity to put it all together on top of everything else.

I've always preferred asian cakes because its more airy and light and they usually cover the cake with a whipped frosting instead of buttercream. We just like everything with less sugar in general. I found a chiffon cake recipe from Martha Stewart's website. I think we really sets this cake apart is the use of cake flour and safflower oil. I used three 9 inch cake pans with a bake time of 25 minutes in this recipe.

For the cake:


2 1/4 cups cake flour (not self-rising)
1 1/2 cups granulated sugar, divided
2 1/4 teaspoons baking powder
3/4 teaspoon salt
1/2 cup safflower oil
7 large egg yolks plus 9 large egg whites
3/4 cup whole milk
1/2 teaspoon cream of tartar
1 whole vanilla bean, split and scraped, or 2 teaspoons pure vanilla extract
Wilton gel food coloring (I used the ROSE one)

For the whipped cream:


 2 cups cold heavy cream
1/4 cup confectioners' sugar, plus more for sprinkling

Directions

1. Make the cake: Preheat oven to 325 degrees. Whisk together flour, 3/4 cup granulated sugar, the baking powder, and salt. Whisk together oil, egg yolks, and milk in a large bowl. Whisk flour mixture into egg-yolk mixture.

2. Beat egg whites with a mixer on high speed until frothy. Add cream of tartar and vanilla seeds or extract, and beat until soft peaks form. Gradually add remaining 3/4 cup granulated sugar, beating until stiff, glossy peaks form, about 5 minutes. Whisk one-third of the egg-white mixture into batter. Gently but thoroughly fold in remaining egg-white mixture with a rubber spatula.

3. Grease the cake pans, dust with cake flour and line the bottom with parchment paper before pouring in the batter.


4. Transfer batter evenly to three, 9 inch cake pans. I used one half toothpick dipped of the gel food coloring for the first pan, then two half toothpicks for the second, and lastly three half toothpicks for the third. Move in a clockwise motion with a fork until completely colored. My first attempt was short in one pan. Bake until top of cake springs back when touched, about 25 minutes. Let cool on racks until.....cool.


5. Whisk heavy cream and confectioners' sugar in the mixer to a sharp peak. Depending how you style the outside, you can even go for soft peaks for the whipped cream. Once the cakes are cooled, use a cake leveler to slice excess off. Add a think layer of whipped cream between each layer (1/8" to 1/4" would work). Continue to cover the cake and style however you like it. I decided to go with a rustic spackling kind of look.

It is good to always do a test run, you can see in the final I did not mix the coloring in completely. Since this chiffon cake calls for folding in the whipped egg whites, I did not feel comfortable going crazy with it. On top of that I did not want to risk ripping the parchment paper I had in the bottom of the pan. I also did double the whipped cream portion to make sure I had enough to fill in between the layers and the outside since the "spackling" needed a whole lot more whipped cream.

But actually the end result came out pretty nice! The cake was very light and definitely does not feel heavy at all. I might add some strawberries or a mixed fruit to serve with it. I know for the final run, I will definitely add more whipped cream in between each layer, portion the batter in each pan evenly, and mix the gel food coloring together better.


Pin It Now!

Thursday, September 13, 2012

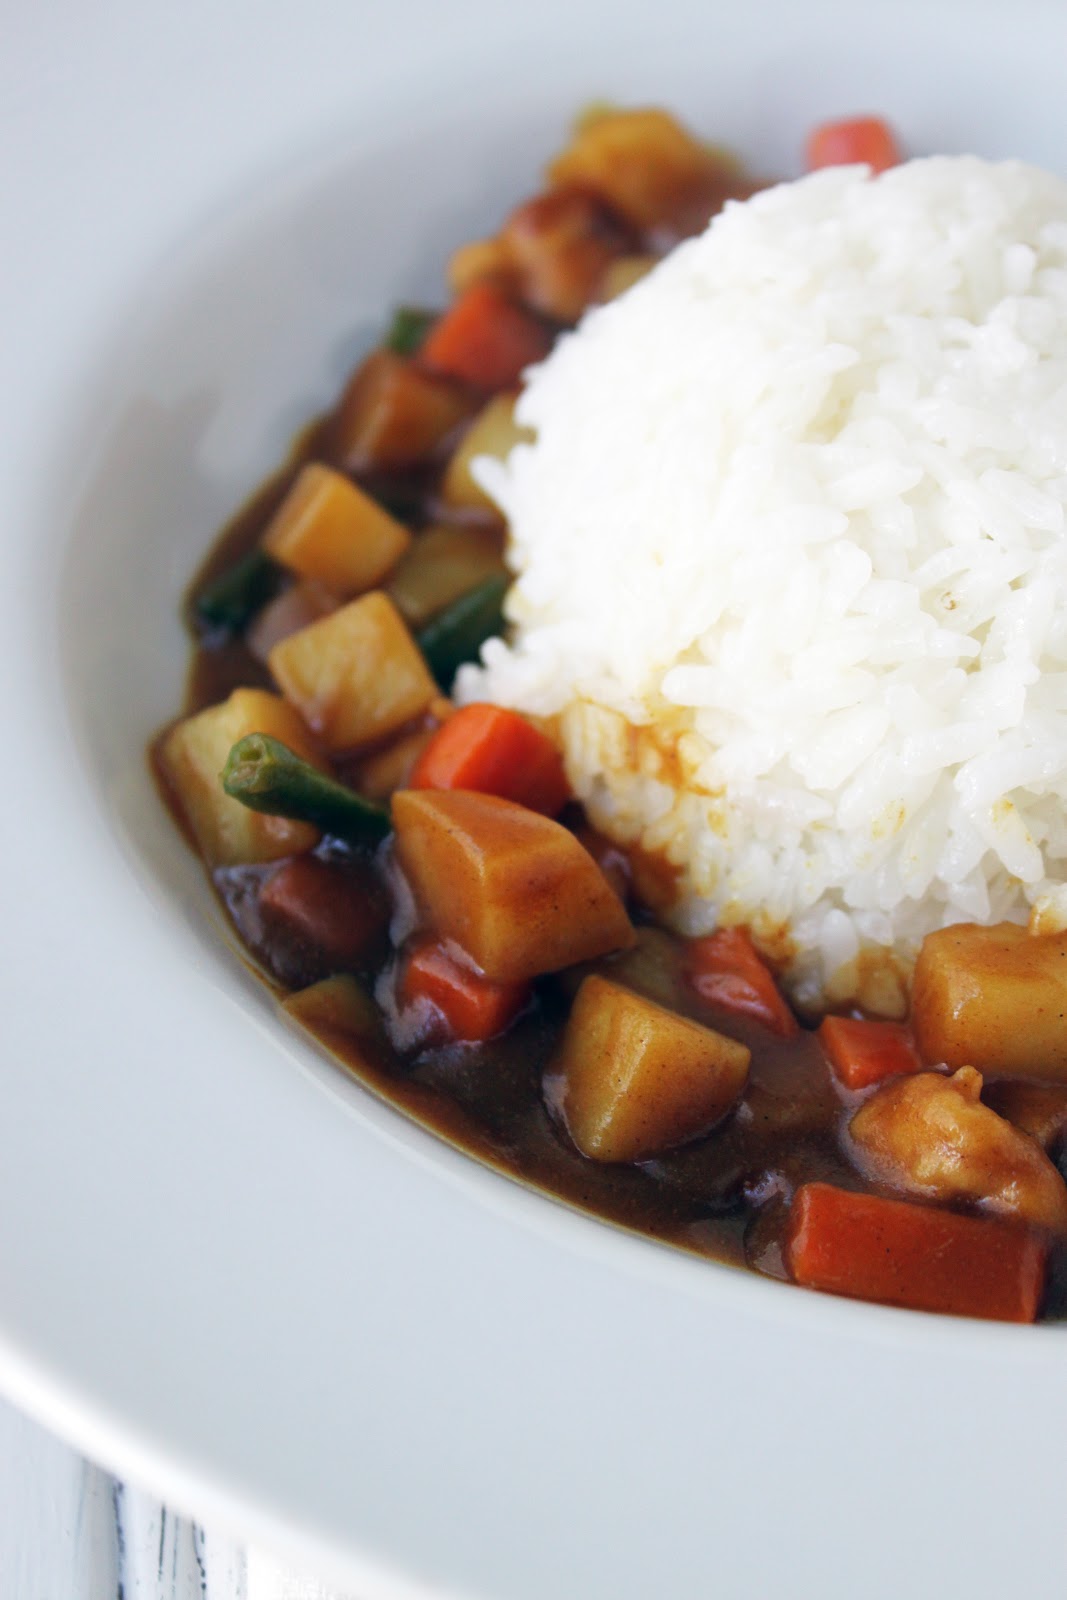
Konnichiwa! Japanese Chicken Curry

Warms up the soul! hahaha
At least once a month or even twice a month, I like to make my chicken curry with rice. There are many types of curry out there, from Thai red-yellow-green curry to Indian curry and then there's Japanese curry. The difference between Japanese and the others is that it is simply a more gravy-like consistency and alot more sweeter. Whereas Thai and Indian is more thinner and consist more of spices.

I like keeping my curry simple, with enough ingredients to pair with the rice and cut them into smaller bites so they can fit nicely on a spoon. (Also plus with little ones, they tend to like food cut into smaller "baby" sizes).


If you go down the international aisle at an American supermarket, you will most likely find Golden Curry. It is not bad, but seems more spice oriented. If you go to a Japanese market, you will find more brands that is similar to the Kokumaro. I definitely like Kokumaro the best because like it says on the box, "The perfect blend of rich and smooth curry". No arguing with that one!

The key players in this gravy boat consist of:

I typically make half the box to feed a family of 3 with enough leftovers for work.

For that quantity I use:

2-3 red potatoes- diced
2 carrots- diced
2 boneless/skinless chicken thighs- cut into 1" pieces
Ziploc bag with All Purpose flour for the chicken
Vegetable Oil
half a box of Kokumaro Curry- 6 blocks
Any additional vegetables (For this meal I had some extra green beans I cut into 1" length)
3 cups of cooked white rice (1:2 rice to water ratio)

There's two ways to cook the vegetables. One way is combine all the vegetables in a microwaveable container with half filled water and zap until half-soft (5 minutes?). Other is sauteed in the pan and add water when it is dry to "pan-steam" the vegetables until tender. After vegetables are tender, put aside. Toss the chicken pieces in a ziploc bag with regular A.P. flour to coat. Shake off excess and sauteed in the pan with oil until brown. When done, add back the tender vegetables and then follow the directions on the curry box to complete.

Curry directions: Combine all the vegetables and meat in the pan, for half box directions, pour 3 cups of water to the pan. Bring to a boil and then lower to simmer for about 15 minutes. Turn the heat down to low and add the curry blocks to dissolve. Stir slowly and the curry blocks will thicken the water into a gravy-like curry.

Love the color contrast between the curry and the white rice
Bite size pieces sure to please all the little ones in the house!!
You can always finish the curry with a dash of milk and a sprinkle of sugar to give it that velvety smooth consistency. I typically don't add that, but I have in the past. This is a dish that everyone in the family will always eat. It's got your staple of potato and carrots as well as chicken! Since fall is coming up, this is definitely perfect for those rainy, cold days!!


Pin It Now!

Thursday, August 30, 2012

Mom's Ginger Chicken Soup with Tofu Noodles


Whenever we start to feel sick or actually come down with some sickness, my mom would always make her chicken soup for us. It is very basic and doesn't involve alot of ingredients at all. In fact, just your simple chicken pieces or a whole chicken cut up, and LOTS of sliced ginger to cook with it.

Ginger has many benefits like anti-inflammatory and cold and flu prevention. There is usually a pot each week and we would just drink this instead of water. This time I decided to try adding Shirataki Noodles (basically tofu noodles).

20 calories? No cholesterol? No sugar? YES PLEASE!
Recipe for chicken broth:
1 whole chicken cut into pieces
Stock pot full of water
1 whole ginger- cut into chunks
Kosher salt
Japanese Hon-Dashi (flavoring agent)
1 stem of green onions- minced
Shirataki tofu noodles

We usually boil the chicken with the bones and ginger until the chicken is close to falling apart. Then we will season it with salt and hon-dashi (Japanese fish bonito flavoring agent). Follow the direction to prepare the Shirataki Noodles. Add in the noodles at the end and top with minced green onions. End result is a very light chicken soup with strong hint of ginger. The ginger compliments the chicken and Joseph absolutely loves this dish. He will have it for breakfast, lunch, or dinner and eat bowls and bowls of it.


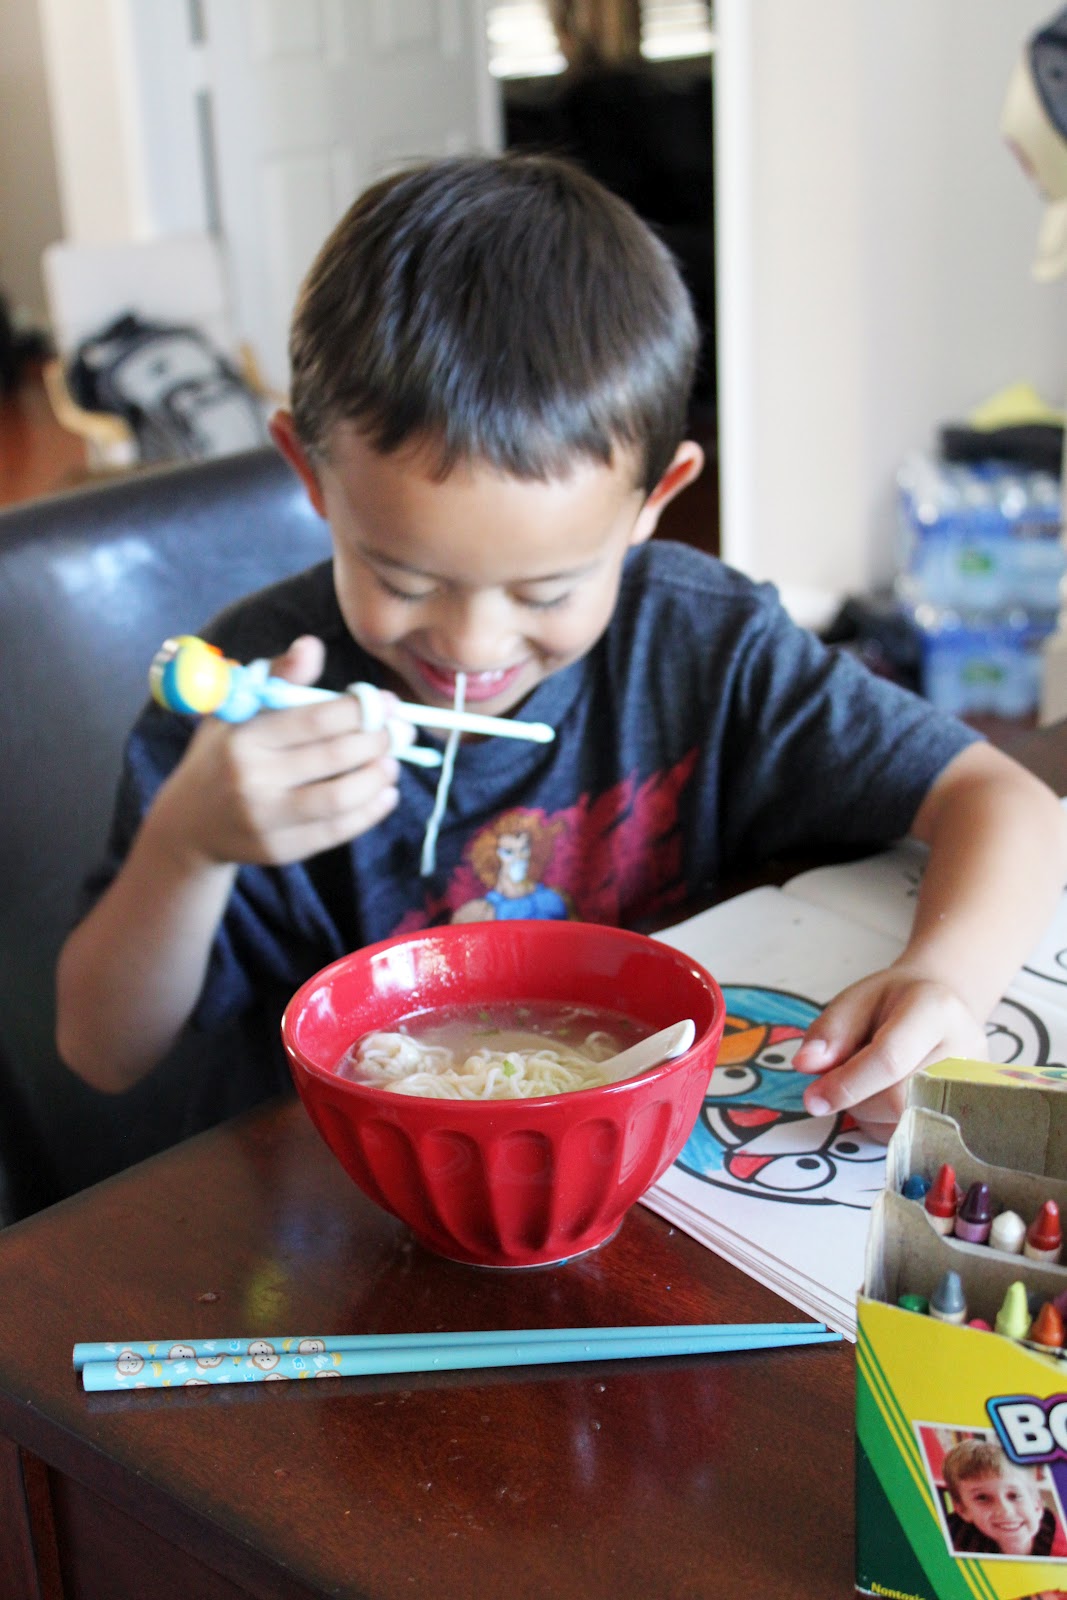
Here is Joseph enjoying the tofu noodles with his all time favorite chicken soup. Slurping it up and trying the tofu noodles for the first time. He was totally amazed of tofu being squeezed into noodles.
He loves his Pororo training chopsticks

Slurp, slurp, slurp!


Until then, Enjoy!

Pin It Now!

Monday, August 20, 2012

Summertime Quesadilla


Summertime splurge. This is that dish. After eating the same ethnic food day after day, it is that feeling of eating something that will put a smile on your face. My Pineapple Shrimp Quesadilla. This dish is on the sweet side which will remind you of a nice tropical place or any happy place you prefer. The touch of the BBQ sauce will remind you of summer time dishes. The shrimp is tasty and yet not too filling. I think this is that perfect summer dish.

Ingredients are your typical go-to items at any grocery store. We will get back in the health routine another day.


I've been wanting to use the case of pineapple chunks I bought from Costco. Throwing it in a quesadilla is just perfect. Adds a nice refreshing taste. I actually slice each shrimp in half (top side down) so the quesadilla wouldn't be too thick for the cheese to hold together. Very simple to assemble, first toss the de-veined, de-shelled shrimp and coat with the fajita seasoning (or taco seasoning is fine). Sauteed on high heat in a pan with oil until pink. Set aside. Now it's time to put it all together:

Flour tortilla ----> Cover with a layer of mexican four cheese ----> Add pineapple chunks (I sliced the chunks in half so it wouldn't be so chunky -----> Add some cooked shrimpy -----> Drizzle some BBQ sauce around ----> Cover with more cheese ----> Cover with the other flour tortilla.

You can also rub some butter on the outside of the tortilla to give it a nicer crisp (which I did).

The oooziness is calling your name...

Butter gave it a nice crisp..too much maybe?
I served it with a side of rice medley so I didn't feel as guilty for eating it. But eating this compared to a regular quesadilla, I didn't feel as stuffed. That's usually a good call!

See the pineapples?!? See the shrimps!?! Ohh yeaa!!
Joseph, who doesn't like pineapples OR shrimp actually ate this up. After coating the shrimp in the fajita seasoning and the BBQ sauce, you can't even tell there's shrimp in that quesadilla!! Until then, enjoy! Pin It Now!

Tuesday, August 14, 2012

Spaghetti Squash Casserole- True Food Inspired


This posting is inspired by a dish I've had many times now at True Food Kitchen. Their Spaghetti Squash Casserole. First of all, I've never cooked with a spaghetti squash before. It is a little on the weird side how after it is boiled or roasted, the meat becomes shreds when you go at it with a fork. Just weird. I like this dish for its simplicity and taste. On top of that, minus all the carbs you would get in a regular spaghetti dish.

That tool thingamijiga in the top right was perfect for making long strands

So far three ingredients!
This dish is enough for 4-5 servings and only cost no more than $10 depending on the brand of sauce and cheese. First I cut the spaghetti squash raw in half, scooped out all the seeds and nasty stringy stuff, put it cut side down on a roasting pan and stuck it in the oven at 400 degrees for about 40 minutes. After that was done, I went at it with a fork which produced spaghetti strands. Then I took my tool and sliced strands on a zucchini. Using the skin of the zucchini is okay, but you would just have to cook it longer.

Toss the vegetable strands with tomato sauce of choice, put in a casserole dish, cover with mozzarella cheese and toss in the over for a good 45 minutes at 350degrees. This time I used fresh mozzarella cheese in a roll. Next time, mozzarella pearls or shredded cheese.

And ding! It's done. The spaghetti squash is naturally sweet after roasting which is good because it can counterbalance the acidity in the tomato sauce. I used Lucini Brand again but it is not as salty or tomato-ey like other brands.

Perfect winter meal but in summertime hahahaha
Yumm
 
Would I make this dish again? Of course! It is very cost effective and require minimal prep work. This is a dish even Joseph can help me with. I think you can probably even sneak in some strands of carrots or eggplants. :) Until then, enjoy :)


Pin It Now!

Wednesday, August 8, 2012

Butterscotch Chocolate Brownie Cookies


These cookies are simply decadent and amazing to eat for breakfast, lunch, or dinner! I found these looking through Foodgawker and immediately caught my eyes. I followed the original recipe from Breanna's Recipe Box.

16 ounces Ghirardelli bittersweet chocolate (60% cacao), chopped
4 tablespoons butter, room temperature
4 eggs
1 1/3 cup granulated sugar
2 teaspoons vanilla
1/2 cup flour
1 teaspoon kosher salt
1/2 teaspoon baking powder
1 cup semi-sweet chocolate chips
Preheat oven to 350 degrees F.  Line two large baking sheets with parchment paper.
Melt chopped chocolate with the butter in a saucepan over low heat, stirring constantly until smooth.  Mix eggs, vanilla, and sugar in a medium bowl.  Combine thoroughly.  Set aside.
Sift flour, salt and baking powder together in a small bowl.
Add melted chocolate mixture to the egg mixture and slowly add dry ingredients.  When combined, add the chocolate chips and stir.
Scoop 1 1/2 tablespoons of dough onto prepared sheets. Here I added the butterscotch chips on top of the dough mixture right before putting it in the oven. Bake 10-12 minutes or until they are firm on the outside (dough loses its sheen).  Leave to cool completely on baking sheets.
**I didn't add any fleur de salt or sea salt since I forgot to buy it at the grocery store. I found the kosher salt in the original recipe was enough**
Baked some with the butterscotch chips, some without for comparison!

Some prefered without for the rich, dark, bitter taste of the chocolate.


This recipe easily baked a good 2 dozen 4 inch cookies. Joseph ate about 6 before I got to trying one. What I like about this recipe is that you can do variations using the brownie cookie as a base to build on. I think next time I want to swirl in caramel with sea salt for a sweet/salty cookie. For those who likes soft cookies, this is definitely it for you. With a nice tall glass of milk, it's good anytime of the day :) Until then, enjoy!


Pin It Now!

Friday, August 3, 2012

Orecchiette Pasta with Salmon and Veggies!

Bright and Colorful, pleasing to all eyes!
Another Joseph Approved dinner! Actually I'll say "half approved" since he had more pasta and salmon than vegetables in his bowl. Orecchiette is one of my favorite pastas. I really like the shape of it since it's usually spaghetti, penne, or bowtie pastas. Wikipedia will give you a history lesson about this cute pasta so I won't bog down this post with that info.

The guests in this summer party:

I did sneak in 1 diced zucchini at the last minute! Sshhhh don't tell!!
I cooked about half the bag of pasta. Used half a bunch of asparagus and about half of diced red bell pepper and it was enough to feed 4 adults and one 6 year old.

*salt/pepper salmon both sides* Pan sear the salmon until a nice golden brown, toss in the oven to finish. Depending on the size. However, since this dish doesn't call to serve the salmon in one chunk, halfway in the oven I broke it apart with a fork.

*salt/pepper each vegetables* Then sauteed the red bell peppers with olive oil to give out that sweet flavor, set to the side and then zucchini showed up in the pan. Gave that a quick sauteed. I typically like to keep the vegetables consistently flipping in the pan so:

1. Veggies don't burn on one side
2. Browns nicely all over
3. Doesn't soften the vegetables as much.

After the zucchinis are done sauteeing (2-3 mins). Then the asparagus came to the party. When that is done, combine all the veggies along with the shredded salmon. Drain the pasta and combin with that salmon-veggie mix. Toss with either pesto paste, fresh pesto, bottled pesto, or powder pesto. TOSS, TOSS, TOSS and it's ready! I added a little bit of goat cheese but found it was too strong so next time I would definitely omit it.

Goat Cheese was only useful for the color contrast in the dish...booo!!!
Very filling and packs a punch of veggies and salmon!

Yummmmy!!
One word of advice when cooking the orecchiette pasta is I would suggest adding them into the boiling water one by one. Ok make a handful at a time as long as you make sure the pasta doesn't go in hugging each other. The ones that stick together tend to still be extra "al dente" to my liking. So that would be the only thing I would do differently next time. Oh, AND THE GOAT CHEESE!! I just have to find a more mild cheese next time. Until then enjoy and check out the other dishes!! Pin It Now!

Wednesday, August 1, 2012

Turkey Chili Hash: Macho Style!


Finally a macho dinner dish for the boys! Two out of the three ingredients in this dish Joseph usually doesn't care for. Most of the time it would be a straight, "no ew I don't want that" kind of answer. Not until we went to Trader Joe's to get cane sugar when they had some stuff to sample. They were giving out samples for their Turkey Chili with beans on french fries. Initially Joseph said ew I don't want that. I came back with the convincing answer of "Look, french fries!!" He took a bite along with the turkey chili on it and was hooked! Next thing I know he is saying "Mommy get this!" as he is putting cans of turkey chili in my basket.

So the other night I was willing to take him out to a restaurant for dinner, out of nowhere he requests the turkey chili for dinner. WOW REALLY!? (Even though at the time I rather of gone out to eat). But alright, this is good news!

Really, no ingredient list or long instruction is needed here. Simply pan fry some hash brown potatoes with salt and pepper (frozen or shredded fresh, I used frozen). Pop open a can of Trader Joe's Turkey Chili (or whichever canned kind you prefer) and following cooking instructions. Once the hash brown are done, pour the chili on top and top with some mexican shredded four cheese! EASY AS THAT!

Serve it in a mini cast iron for that campfire feel..

Every guy young and old will like this dish. No greens!
As small as my cast iron mini bowl is, the dish itself is very filling. I used about half a bag of the frozen hash brown, one can of turkey chili and it was enough to feed a 6 year old, me, and the husband. I typically like some kind of greens to go along with my dish, so you can always add a side salad to make up for that.

Hearty, yet satisfying...isn't that from Lion King? haha
Try it out, this takes at most 10 minutes. I think even my 6 year old can learn to make this dish. Enjoy and check out the other recipes in the blog!! Pin It Now!

Sunday, July 29, 2012

Breakfast: Egg White Spinach Soyrizo Panini

Macho looking=YES? Macho bad ingredients=NO!
Not that everyone has soyrizo sitting in their refrigerator all the time, I decided to finally take it out of the fridge and do something with it. Soyrizo is basically tofu with more spices than you can count put into a link of sausage but meatless. TASTE JUST LIKE CHORIZO! (With less grease of course). So I thought let's just do a good ol' breakfast panini. Simple to make and easy to eat. This panini is easy to fool the veggie haters.

One for me, one for mom.
All you need in this macho looking panini is just FIVE ingredients:

Sliced sourdough bread
Baby Spinach (sauteed in pan with a little salt)
Soyrizo (sauteed out of casing)
Scrambled egg whites (I used about 5)
Shredded mexican four cheese

Put in any order you like preferably with the cheese next to the sourdough. Put in panini press and it's done in no time. I did brush the outer parts of the sourdough with olive oil so it would be nice grill marks.

For those with weak teeth, regular texas toast would work..grilled cheese maybe?

Crunch, crunch, crunch..
The soyrizo is pretty spicy just like regular chorizo. By using egg whites and sauteed baby spinach, it helps neutralize the spices. You can do any combination by either adding more egg whites to the soyrizo, or more spinach to the panini, or more soyrizo and less of everything else. In the end it's a great breakfast panini to perk you up! I think if I did a blind test, most people would say there's egg yolks and meat in this sandwich!

This one came out with the nice grill marks.
I actually meant to add avocado to the panini to help with the strong flavor of the soyrizo. But I totally forgot so that ended up in a smoothie my mom and I concocted. I will just use the extra avocados and left over soyrizo egg white scramble and work it into a nice burrito tomorrow. :) Until then, enjoy!

Pin It Now!

Share and Enjoy!

Related Posts Plugin for WordPress, Blogger...